For this tutorial you will need AGI Studio and Picedit both available here
Step 4: Drawing the First Picture
Now you will need to draw a picture for the first room with Picedit. Download the Priority band .pcx file for this step. once you have unzipped the .pcx file into your picedit/AGI Studio directory, make sure that picedit is in the same directory as AGI Studio. The Right Click on picedit.exe and edit the program properties so that it looks like this.
Picedit.exe pribands.pcx
Now click on apply.
Once you have closed the properties for Picedit go back to AGI Studio and click on the Picedit button
![]()
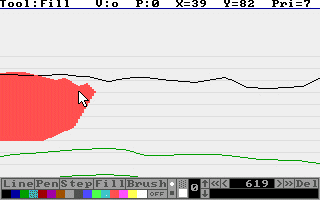
When Picedit has loaded press F10 and You will see the priority lines.
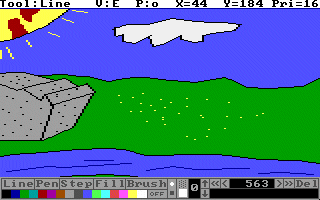
Now draw your picture using the tools at the bottom of the screen.

This is what your picture should look something like.

After I had added priorities.
Draw the priorities by pressing tab and switching between the two views. For a more full explanation of priorities click here. I do not know where this document came from, I just found it in my picedit directory therefore the links will not work.
Make the edges of the water Priority 2.
Save the image as PICTURE.002
Exit Picedit.
Top
You can help keep The Sierra Help Pages and its affiliates alive by helping to defray some of the costs of hosting this site. If it has been of help to you, please consider contributing to help keep it online.Thank you.
The Sierra Help Pages | Sierra Game Help | Walkthroughs | Hints, Tips & Spoilers | Utilities | Links | SHP Forums | Search
© 2013 to present The Sierra Help Pages. All rights reserved. All Sierra games, artwork and music © Sierra.